You’ve decided to take a look at the exciting world of online presence and start your own website. Warm regards! Thankfully, it’s not as hard as it would appear. You may have your own online space in a few easy steps with WordPress’s user-friendly framework. Let’s divide it into manageable steps:
Step 1: Setting the Stage
Before we dive into the technical details, give your website a minute to formulate an objective. Are you building a portfolio, a personal blog, or maybe a website for a small business? Your website’s content and design will be influenced by your understanding of your objectives.
Step 2: Get Your Domain and Hosting
- Domain: Choose a memorable and unique domain name for your website. One is available for purchase from domain registrars such as Namecheap and GoDaddy.
- Hosting: Aiding with Hosting Select a reliable web server to host your website’s files on. Popular options include Bluehost, SiteGround, and HostGator.
Step 3: Install WordPress
Most hosting providers offer an easy-to-use and fast way to install WordPress. Look for a “one-click install” option in your hosting dashboard and follow the directions. This will create the basic framework for your webpage.
Step 4: Choose a Theme
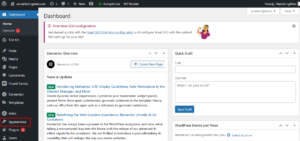
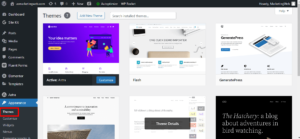
With WordPress, you can easily alter the appearance and feel of your website thanks to its extensive theme library. Open the WordPress dashboard, select “Appearance,” and then “Themes.” Examine a few themes and select the one that best fits your goals and style.
Step 5: Customize Your Site
- Site Identity: Site Name Under “Site Identity” under the “Customize” section, enter the title and tagline for your website.
- Menus: Menu Make a navigation menu to facilitate visitors’ easy exploration of your website. This can be completed in the “Menus” area.
- Widgets: Use widgets to add practical aspects to your website, such a search bar, categories, or recently published content.
- Step 6: Create Your First Pages and Posts
- Pages: Make sure to include sections like “Contact,” “About Us,” and “Home.” Navigate to “Pages” on your dashboard to add new pages.
- Posts: To start sharing your content, write blog posts. Go to “Posts” to start writing and publishing your first post.
Step 7: Install Essential Plugins
Similar to apps, plugins increase the features and functionality of your WordPress website. Some must-have plugins include:
- Yoast SEO: Improve the search engine optimization of your website..
- Contact Form 7: Easily create contact forms for your visitors.
- Akismet Anti-Spam: Protect your site from spam comments.
Step 8: Launch Your Site
It is now time to launch your website after you have finished updating its content, making any necessary design changes, and installing any plugins. Best wishes! The public can now view and access your website.
Final Thoughts
If you follow these simple steps, creating a WordPress website may be as easy as pie, even though it may appear difficult at first. Remember that your website is a representation of you or your company, so enjoy the design process and don’t be scared to add your unique style! Joyful Happy creating your website!


